A WooCommerce product page is the first place customers go to when they’re considering making a purchase. If you are running a WooCommerce store, having a well-designed product page is very important.
A well-optimized product page not only enhances user experience but also boosts conversion rates. That is the reason why you need to customize WooCommerce product page that can help you attract customers and make them buy your product.
In this guide, we’ll provide all the possible ways to customize your WooCommerce product page using built-in features, page builders, custom codes, and plugins. In addition to that, some of the SEO best practices you can follow to improve your site visibility are elaborated.
Attach the sale badge to your products on the product page and show the discount percentage on the product page using the Discount Rules plugin.
Why Customize WooCommerce Product Pages?
Customizing your WooCommerce product pages is essential to creating a unique shopping experience for your customers that aligns with your brand identity. A tailored product page can impact user engagement as well as sales performance.
By strategically customizing your WooCommerce product page, you can showcase your products more effectively, provide detailed information about them, and create an easy purchasing process for your customers.
Methods to Customize WooCommerce Product Pages
There are many ways in which you can customize your WooCommerce product page. Here’s a list of it.
- Built-in WooCommerce Features
- Using Page Builders
- By Coding
- Using external Plugins
1. Using Built-in WooCommerce Features
WooCommerce has several built-in features that allow store owners to customize their product pages without needing to install third-party plugins or write code. These features are user-friendly and provide WooCommerce store owners with a straightforward way to make their product pages more engaging, visually appealing, and functional.
Procedure:
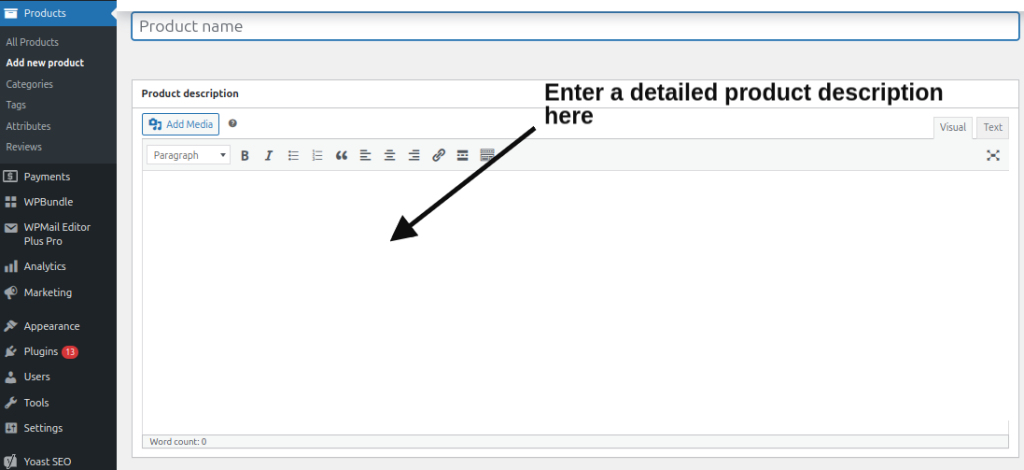
- Customizing Product Descriptions: Go to your “WordPress Dashboard” -> “Products” -> “All Products”, select your product, and edit its description and short description. Use bullet points for better readability and incorporate keywords for SEO purposes.
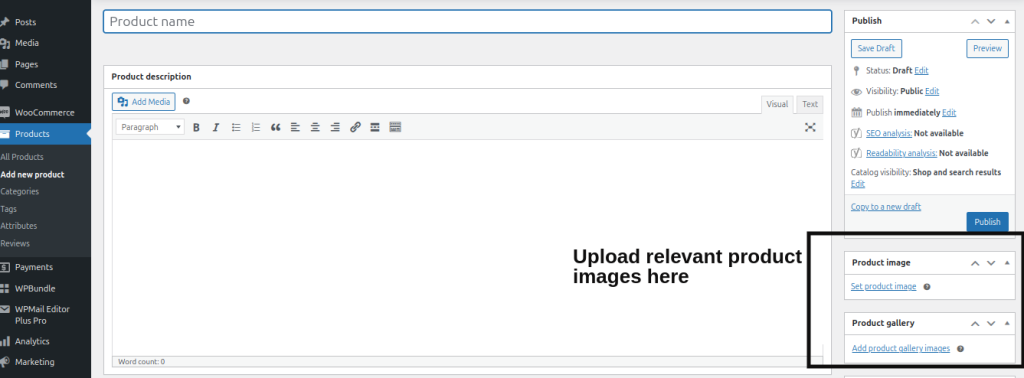
- Editing Product Images and Galleries: In the Product Image and Product Gallery sections, upload high-quality images that show your product from multiple angles and include a zoom-in feature.
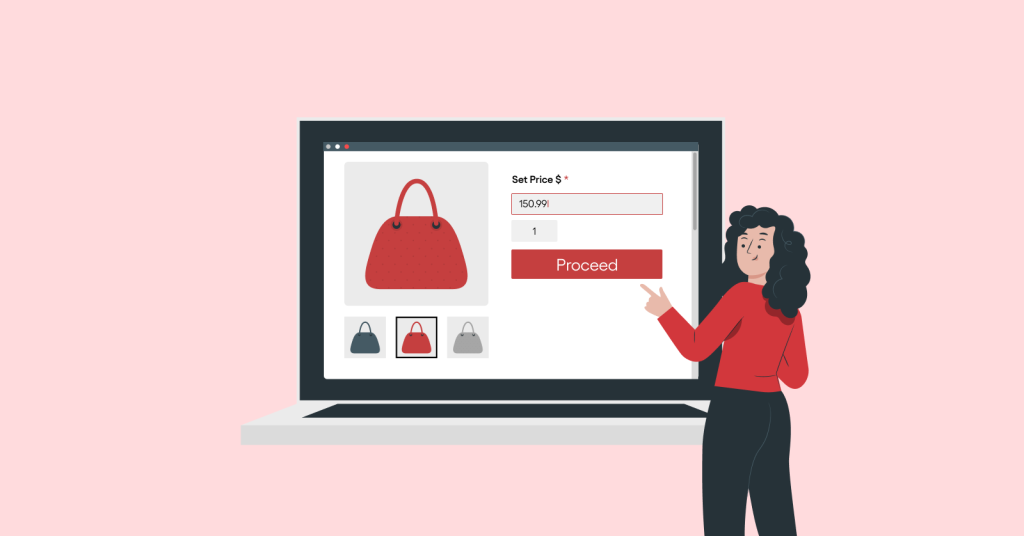
- Adjusting Product Price and SKU: Under the General tab in the Product Data section, update the regular and sale prices and add an SKU for inventory management.
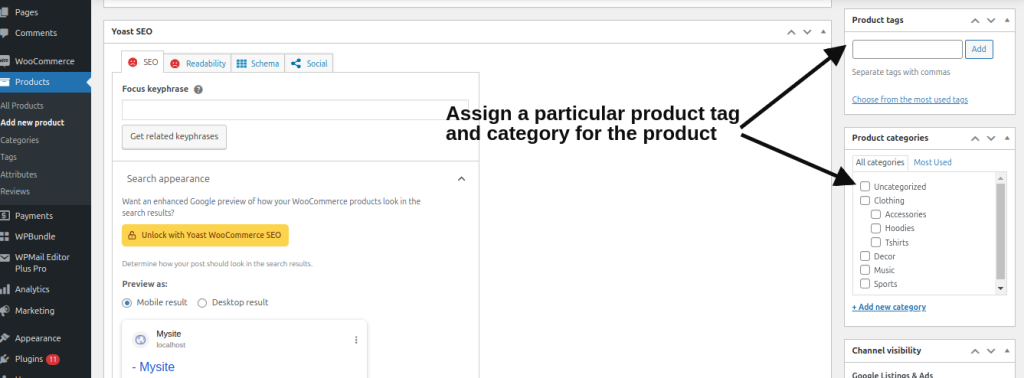
- Using Product Categories and Tags: Select or create new categories and tags for better product organization and discoverability.
- Adding Custom Attributes: Under the Attributes tab in the Product Data section, create attributes like color, size, and material, and display them on the product page.
- Managing Stock and Availability: Use the Inventory tab to manage stock levels, enable backorders, and set stock status.
Best Practices:
- Clear Product Descriptions: Always ensure your product descriptions are detailed yet concise, focusing on benefits rather than just features. By using bullet points you can make key details easy to scan.
- High-Quality Images: Use multiple high-resolution images, so you can give your customers a better look at your product. Include a zoom feature if possible for enhanced detail.
- Pricing Transparency: Display both regular prices and sale prices. Avoid hiding costs like shipping until the last step, as this can lead to cart abandonment.
- Organize Products Effectively: Use product categories and tags, so, to guide customers to similar items, improving their shopping experience. As a result, this not only boosts product visibility but also drives higher conversion rates and more sales
- Regular Stock Updates: Ensure that stock levels are constantly updated, so, to avoid customer frustration. If the product is out of stock, you can consider alternative options such as similar products, related items, or pre-ordering for future availability.
Use discount tables that show bundle discounts effectively on the product page using the Discount Rules for WooCommerce plugin.
2. Customizing with Page Builders
Page builders are a way to customize WooCommerce product page without needing to write code. These tools let you drag and drop elements, adjust the layout, and change the look and feel of your product pages.
Popular page builders for WooCommerce include Elementor, WPBakery, and Gutenberg.
2.1. Elementor for WooCommerce
Elementor is one of the most popular page builders for WordPress and WooCommerce. With its drag-and-drop editor, you can customize nearly every aspect of your product page.
Procedure:
- Install and activate Elementor.
- Go to your product page and click Edit with Elementor.
- Drag and drop widgets like Product Title, Price, Image, and Description.
- Customize the appearance using Elementor’s styling options.
- Save and publish your changes.
After saving the changes, it gets automatically reflected on your WooCommerce website.
Best Practices:
- Use WooCommerce Widgets: Use the available WooCommerce widgets to ensure all product data, such as pricing, images, and product descriptions, are dynamically pulled from the product page.
- Design Consistency: Maintain consistency in design throughout your product pages. Also, ensure product titles, images, and prices are aligned and visible.
- Mobile Optimization: With Elementor, ensure that the page layout is mobile-optimized. Since a large percentage of online shopping is done on mobile, a responsive design is important.
- Limit Animations: Though animations are engaging, excessive use of them can distract visitors from key product information. Hence, keep them minimal.
2.2. WPBakery Page Builder
WPBakery offers both front-end and back-end editing, making it easy to customize WooCommerce product page.
Procedure:
- Install and activate WPBakery.
- In the product editor, click the WPBakery Page Builder button.
- Add WooCommerce elements like Product Title, Price, and Add to Cart button.
- Customize using WPBakery’s style options.
- Save and preview your page.
Best Practices:
- Streamline Layout: Keep the product page layout simple and intuitive, so, to ensure all the critical information like the product price and the “Add to Cart” button are prominently displayed.
- Use Row and Column Structure: Utilize the row and column structure in WPBakery. So, you can align content properly and make the page easy to navigate.
- Preview Changes Regularly: WPBakery allows for live editing, so, you can regularly preview your changes and ensure everything looks good on both desktop and mobile devices.
2.3. Gutenberg
Gutenberg, WordPress’s default editor, is a simpler option for customizing product pages.
Procedure:
- Open the product page in the WordPress editor.
- Add blocks like Product Title, Price, and Image using the WooCommerce Blocks plugin.
- Customize each block’s appearance using the editor’s styling options.
- Save and preview your changes.
Best Practices:
- Simple Layout: Use Gutenberg for simpler, cleaner designs, so, to avoid overly complex layouts that could confuse your customers.
- Block-Specific Customization: Customize individual blocks (such as text, images, and buttons) based on the product’s needs. This ensures you create a product page that is both functional and visually appealing.
- Test Responsiveness: Double-check that your Gutenberg customizations work well on both desktop and mobile versions.
3. Editing Templates with Code
If you want complete control over your WooCommerce product pages, editing the templates directly is your best option.
WooCommerce uses a templating system that allows you to modify product pages through PHP, HTML, and CSS. This method requires some coding knowledge but provides a high level of flexibility and can result in a highly customized product page.
3.1. Understanding WooCommerce Template Structure
WooCommerce uses a set of predefined template files that structure the layout of product pages, so, to override these templates by creating a custom theme or child theme.
Procedure:
- Navigate to wp-content/plugins/woocommerce/templates.
- Copy the single-product.php and content-single-product.php files to your theme’s directory.
- Edit these files to modify the layout and design as needed.
Best Practices:
- Create a Child Theme: Always use a child theme to make changes, so you don’t risk losing your customizations when updating your parent theme.
- Avoid Overcomplicating the Code: Keep customizations simple, so, to ensure the page remains fast and functional. Use comments to explain complex code for future reference.
- Use Hooks and Filters: Leverage WooCommerce hooks and filters to add content dynamically to product pages without altering the core templates.
3.2. Customizing with CSS
CSS allows you to modify the visual appearance of your product page.
Procedure:
- Go to Appearance > Customize > Additional CSS.
- Write custom CSS rules to modify the layout and design of the product page.
- Save your changes and preview the page.
Best Practices:
- Target Specific WooCommerce Elements: Always use specific CSS selectors to ensure your styles apply only to the intended product page elements.
- Responsive Design: Write mobile-first CSS and use media queries to adjust the page layout for various screen sizes.
- Performance Optimization: Keep CSS minimal and avoid over-styling. Excessive CSS can lead to slower page load times.
4. Customize WooCommerce Product Page with Plugins
Though built-in WooCommerce customization options and page builders are helpful, plugins can take your WooCommerce product pages to the next level.
There are several powerful plugins available that provide advanced functionality and design features that you might not find in the default WooCommerce settings. These plugins help you add unique elements to your product pages without needing to code.
4.1. WooCommerce Product Add-Ons
The WooCommerce Product Add-Ons plugin allows you to offer additional options to customers, such as custom engravings, gift messages, or product customizations.
Procedure:
- Install and activate the WooCommerce Product Add-Ons plugin.
- Go to Products > All Products, and select the product to add options to.
- Add extra fields like checkboxes, radio buttons, or text fields in the Add-Ons tab.
- Customize each field and save your changes.
Best Practices:
- Keep It Simple: Only add essential customization options to avoid overwhelming customers.
- Provide Clear Instructions: Always add descriptions or tooltips to customization fields to ensure customers understand what’s expected.
- Test for Errors: Regularly test the added fields to ensure they work as intended and the pricing is updated correctly.
4.2. Customizer for WooCommerce
The Customizer for WooCommerce plugin offers extra customization for your product pages without you needing to code manually. Here’s the procedure to use the plugin.
Procedure:
- Install and activate the Customizer for WooCommerce plugin.
- Go to WooCommerce > Customizer to access additional customization settings.
- Modify settings like the “Add to Cart” button text, product image sizes, or product tabs.
Best Practices:
- Make Small Adjustments: Use this plugin for small tweaks like changing button text or adjusting image sizes.
- Monitor Performance: As you make changes, ensure that the site performance remains optimal and doesn’t slow down.
4.3. YITH WooCommerce Product Add-Ons
Another useful plugin is YITH WooCommerce Product Add-Ons, which lets you offer personalized product options like engraving or custom texts.
Procedure:
- Install and activate the YITH WooCommerce Product Add-Ons plugin on your WordPress Dashboard.
- In the product editor, find the Product Add-Ons section and add options like text fields, color selectors, or anything you want.
Best Practices:
- Limit Options: Offer personalization options only for products that require them. Too many options on the product page can confuse buyers.
- Clarify Charges: Ensure that any additional charges for product customizations are communicated to the customer during checkout.
Best Practices for WooCommerce Product Page Customization
Customizing your WooCommerce product page is not just about making it look good. It’s about creating a functional experience for your customers that leads to conversions. Here are some best practices to follow:
1. Design Consistency and Branding
Your product page is an extension of your brand. Ensure that the design aligns with the rest of your website, from fonts and colors to the layout and tone of voice. Consistency is key to building trust with your customers.
- Brand Identity: The design should reflect your brand’s identity. Use colors, fonts, and images that align with your overall brand style.
- Clear Layout: Keep the layout simple and easy to navigate. A cluttered page can overwhelm customers. Therefore, ensure key information, like pricing and the “Add to Cart” button, is easily seen and accessible.
2. Mobile Responsiveness
According to Wisernotify’s study, more than 70% of customers worldwide shop via Mobile devices.
With more customers shopping on mobile devices, your product pages must be responsive and easy to navigate on mobile screens. Ensure images resize properly, buttons are clickable, and text is readable.
- Mobile-Friendly Design: Check how your product page looks on different devices. Many page builders like Elementor offer mobile design options that let you adjust the layout specifically for mobile devices.
3. User Experience Enhancements
A well-designed product page should not only look good but also provide a great user experience. Consider adding the following features to your WooCommerce product page.
- Quick View: Allow customers to quickly view product details without leaving the page.
- Sticky Add to Cart Button: Make the “Add to Cart” button always visible, even as customers scroll down the page.
- Customer Reviews: Adding a section for customer reviews on your product page helps build trust and provides social proof.
4. SEO Optimization Techniques
SEO is one of the most important factors that can bring customers naturally without store owners requiring to spend money on ads. An SEO-optimized product website can improve product visibility and drive more organic traffic to your store.
- Rich Snippets: Use structured data to enable rich snippets in search results, displaying star ratings, price, and availability.
- Image Optimization: Compress your images to ensure fast page loading times without sacrificing quality.
- Product Descriptions: Ensure your product descriptions are SEO-friendly by including relevant keywords, such as product features, benefits, and common search queries. Doing so will help your products appear in the search results.
Showcase special offers using the discount bar on your product page and effectively do promote your deals using the Discount Rules plugin.
Conclusion
Customizing your WooCommerce product page is key to creating a unique shopping experience that aligns with your brand. Whether you choose to use page builders for easy drag-and-drop customization, edit templates with code for total control, or enhance functionality with plugins, there are plenty of ways to tailor your product pages to your needs.
Each method has its advantages, so choose the one that best fits your technical ability and the level of customization you want to achieve. With well-optimized product pages, your store will not only look more professional but also perform better, driving more sales and happier customers.
Also Read:
- How to Customize WooCommerce Order Emails
- How to Display Discounts on WooCommerce Product and Cart Pages
- How to Show WooCommerce Related Products
Frequently Asked Question
Yes, you can customize the product page using any customize product page plugin available for WooCommerce. These plugins allow you to modify various elements of your product pages without coding.
To customize the WooCommerce shop page programmatically, create a child theme and override the archive-product.php template. This allows you to modify the shop page’s layout and functionality without affecting the original theme.
To customize WooCommerce pagination, you can use the plugin “Pagination Style”, which allows you to modify pagination styles without coding.
To change your WooCommerce product page layout, you can utilize any WooCommerce product page template free plugin such as ProductX, which allows you to customize product pages without coding.
To customize WooCommerce product page with Elementor, navigate to Template Theme Builder Single Product Add New in your WordPress dashboard. Create your design using Elementor’s drag-and-drop editor. Then, publish and set display conditions as needed.
To locate and customize WooCommerce product page single product template, navigate to wp-content/plugins/woocommerce/templates/content-single-product.php. To preserve your changes during updates, copy this file to wp-content/themes/your-child-theme/woocommerce/content-single-product.php and edit it there.
By utilizing plugins like ProductX, which offers a “WooCommerce Product Page Template Free”, you can enhance your product pages without incurring additional costs.